Introduction #
This guide will take you step-by-step through the manufacturing of a wood tri-color American Flag. Please read through all steps before beginning.
You are free to use whichever wood species you think look best. In this guide, the recommended wood species are Walnut (as a stand-in for the blue Union), Cherry (for the red stripes), and Maple (for the white stripes and the stars).
This guide focuses mainly on the steps required to make the flag. It does not, however, go into detail on the more advanced features of Autodesk Fusion. If you have questions, as always feel free to reach out to j.workmandm@gmail.com.
What you need: #
| Materials |
|---|
| Walnut (rift or quarter-sawn is preferable) |
| Maple (rift or quarter-sawn is preferable) |
| Cherry (rift or quarter-sawn is preferable) |
| Wood Glue |
| Tools |
|---|
| CNC Router |
| Table Saw |
| Planer (can be done with the CNC) |
| Face Mill |
| V-bit (60 degree inclusive angle or narrower preferred) |
| Straight Bit |
Step 1 – Cut and Glue Stripes #
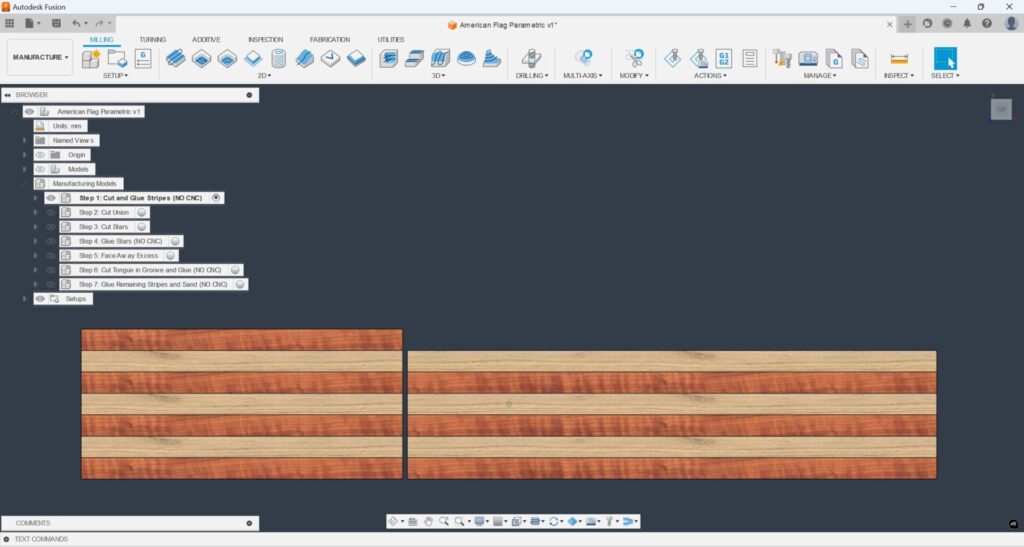
Step 1.1
- Cut 3 strips of Maple and 4 strips of Cherry that are at least as long as:
- FlagLength+(FlagLength-UnionLength)+BladeKerf*3+TongueDepth
- The strips should be as wide as your Stripe Width.
- The strips should be as thick as your desired Flag Thickness plus enough to plane them smooth on both sides after the glue up.
- Note: One of your Cherry strips can be shorter than the rest, but it needs to be at least as long as (FlagLength – UnionLength) + BladeKerf*2

Step 1.2
- Glue the strips in an alternating pattern with Cherry on the outside.
- After the glue has dried, plane the glue-up until it is just slightly thicker than your desired thickness so that it can be planed again once glued to the union.
- Cut one end of the stripe glue-up square, then make a cut at your desired Flag Length.
- Rip off the extra Cherry strip from the longer section.
Step 2 – Cut the Union #
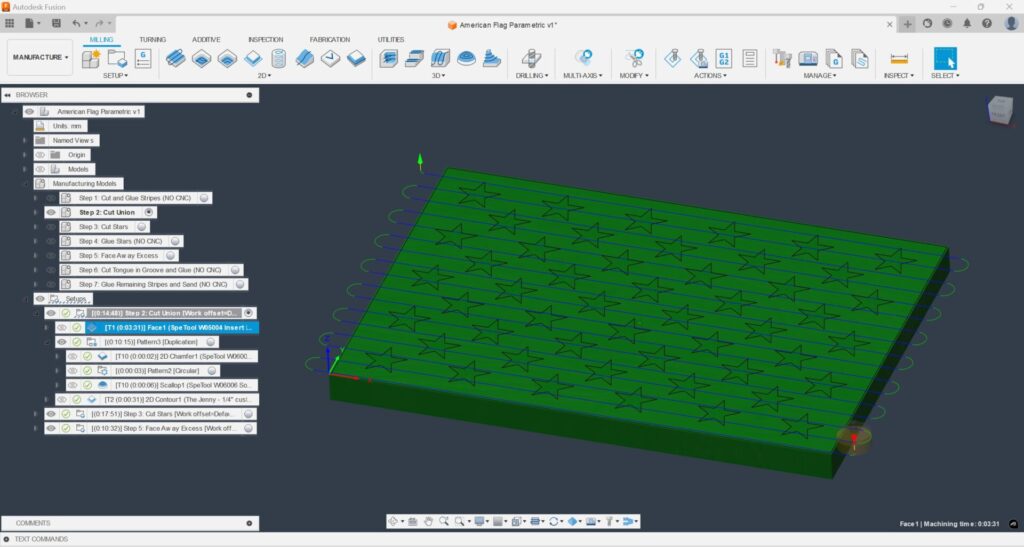
Step 2.1
- Face
- Use a Facing operation to flatten a piece of Walnut that is slightly larger than the dimensions of your Union.
- Leave 1mm of extra material on top that will get removed after the stars are glued into it.
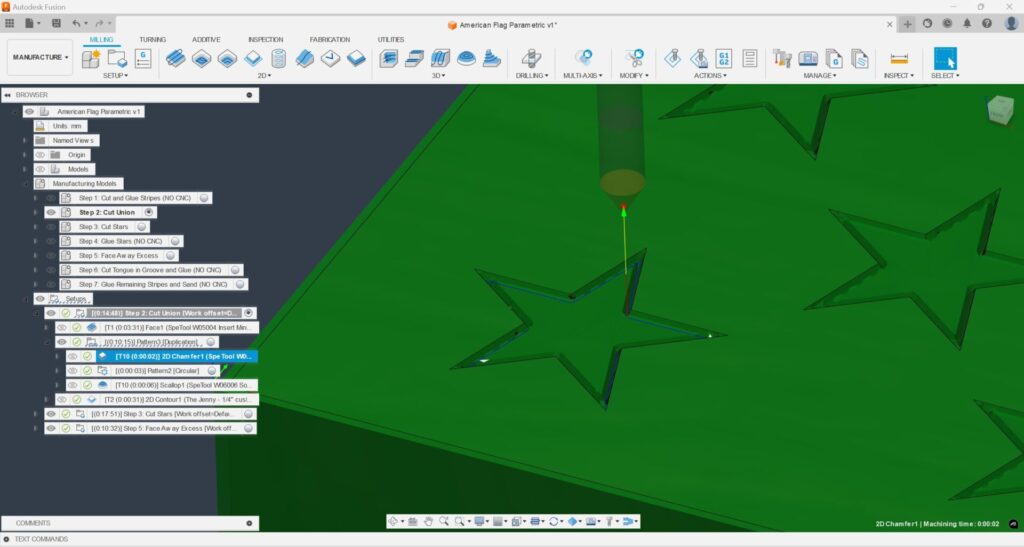
Step 2.2
- 2D Chamfer
- Use a V-bit to make a shallow groove around each star to prevent tearout for subsequent steps.
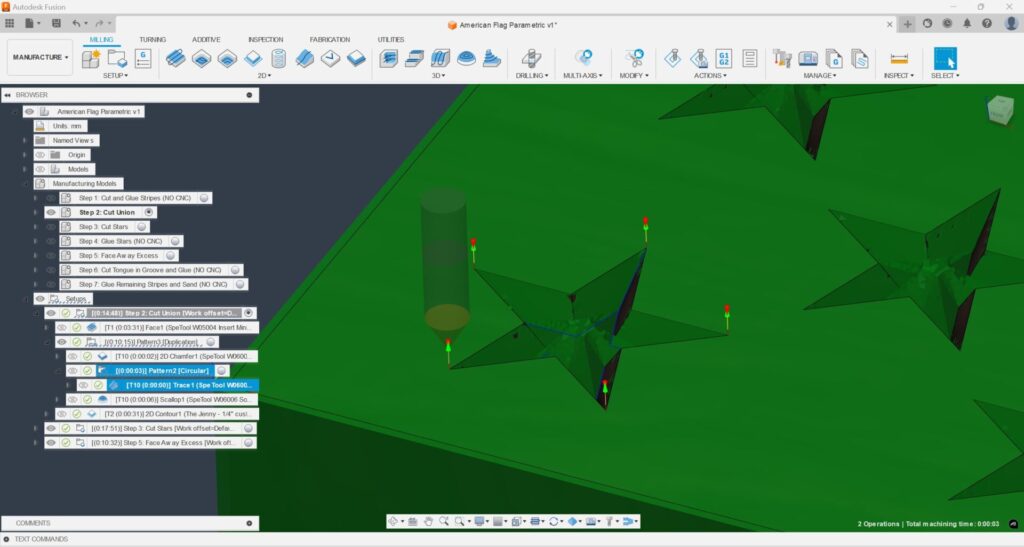
Step 2.3
- Trace
- Cut the sides of the star by tracing the sharp corners of the star negative with a V-bit.
- This can be done in a circular pattern, going down one point and up another.
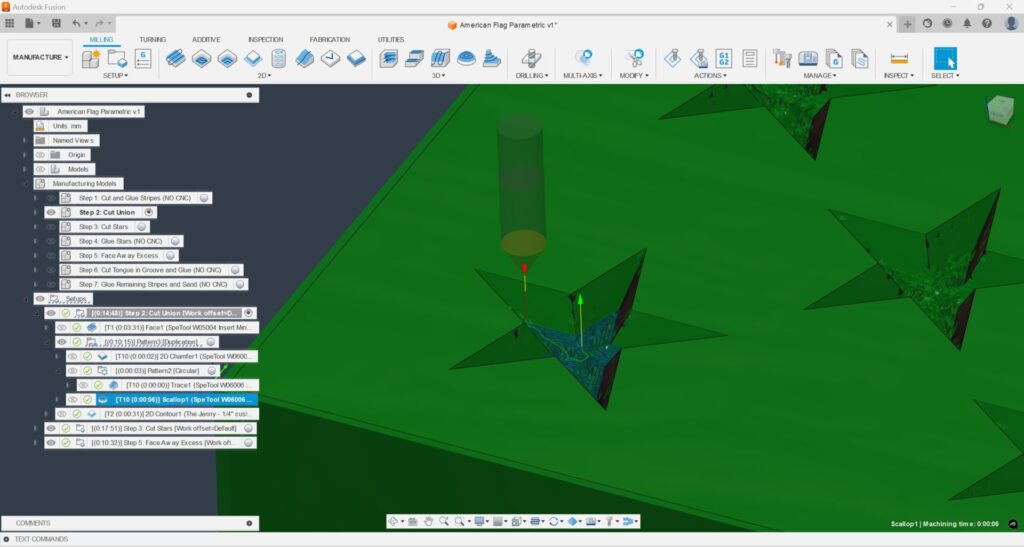
Step 2.4
- Scallop or Pocket
- Cut away the bottom of the star pocket using a V-bit in a Scallop/Spiral toolpath with a small stepover.
- Alternatively, if your stars are big enough, you may use a Pocket operation with a straight bit to clear most of the material, but you will still need to clean up the corners with a V-bit.
Step 2.5
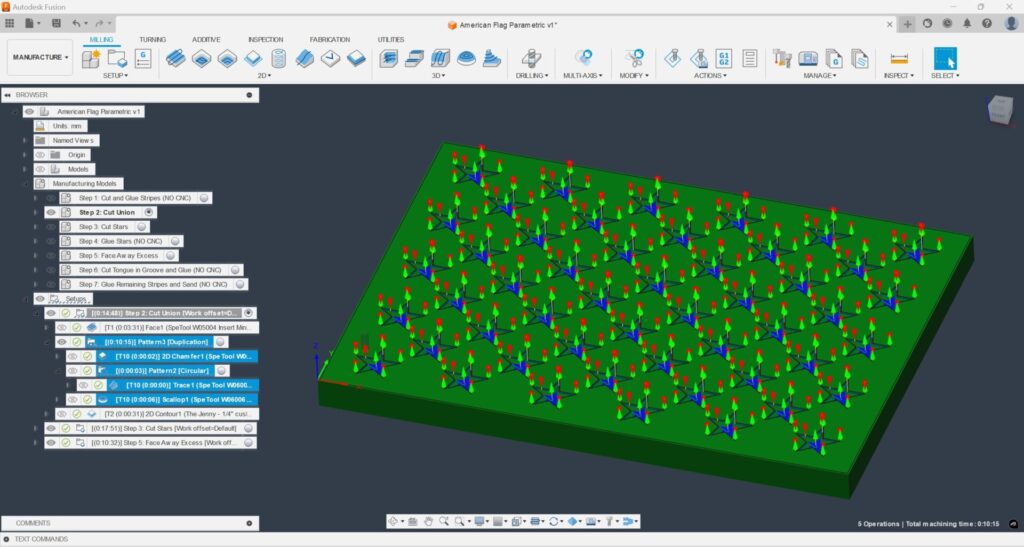
- Duplication Pattern
- Pattern the toolpaths from Steps 2.2-2.4 (Chamfer, Trace, Scallop) using a duplication pattern at the locations of all 50 stars.
Step 2.6
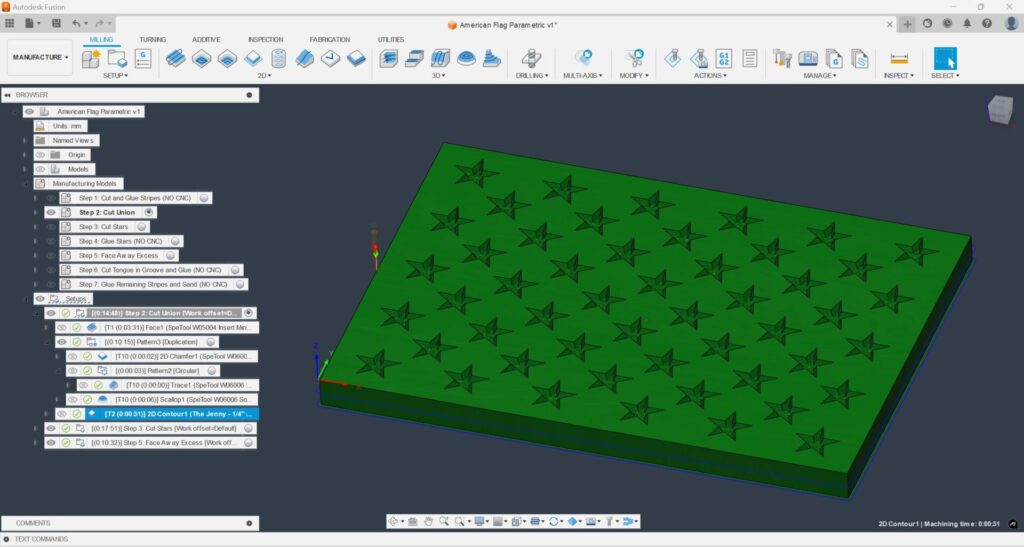
- Contour
- Cut the outer profile of the Union with a straight bit.
Step 3 – Cut the Stars #
Step 3.1
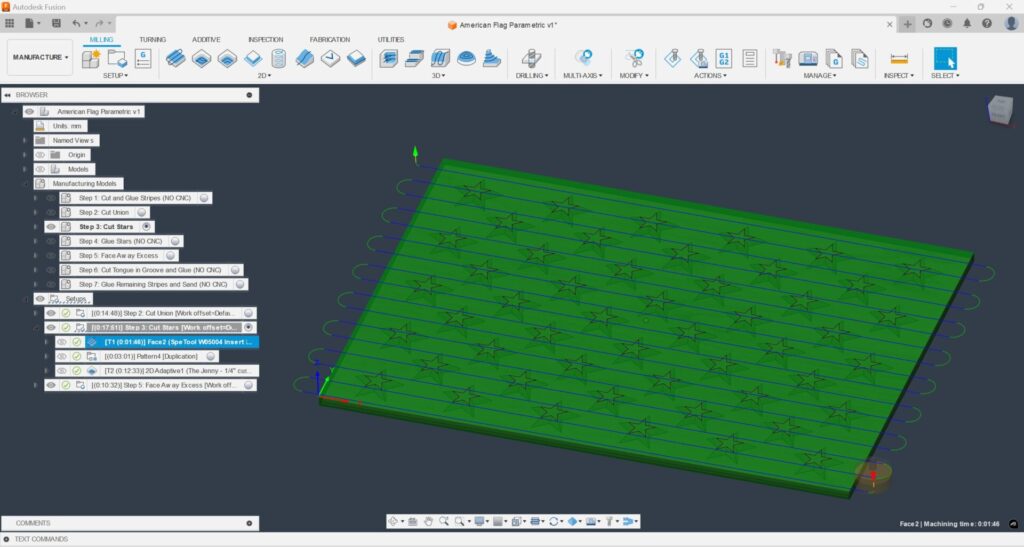
- Face
- Use a Facing operation to flatten a piece of Maple that is the same size as your Union ( it can be a little smaller, since the stars don’t touch the edges)
- The overall thickness after facing should be just a few millimeters thicker than the depth of the Union star pockets cut in Step 2.
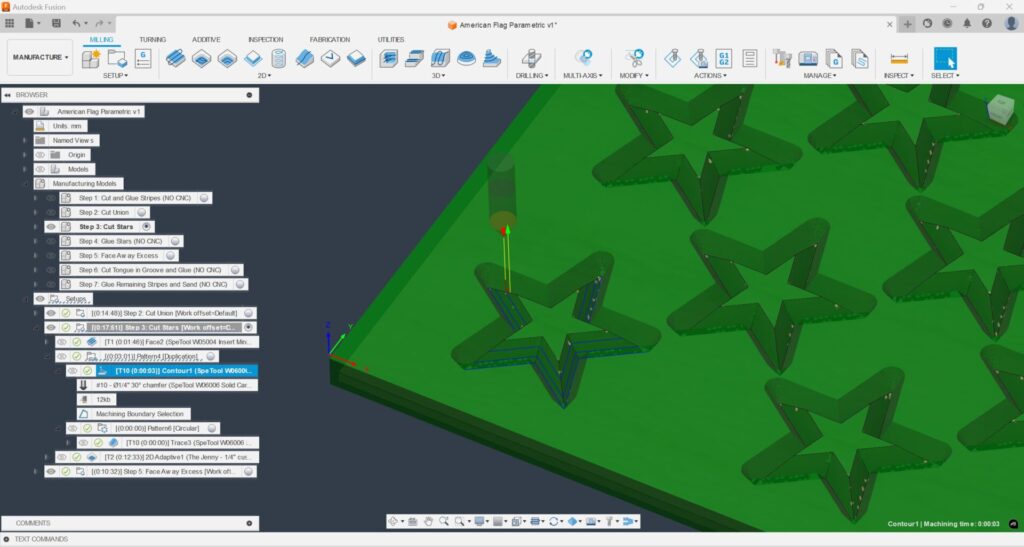
Step 3.2
- Contour
- Use a V-bit to carve out the face contours of the star.
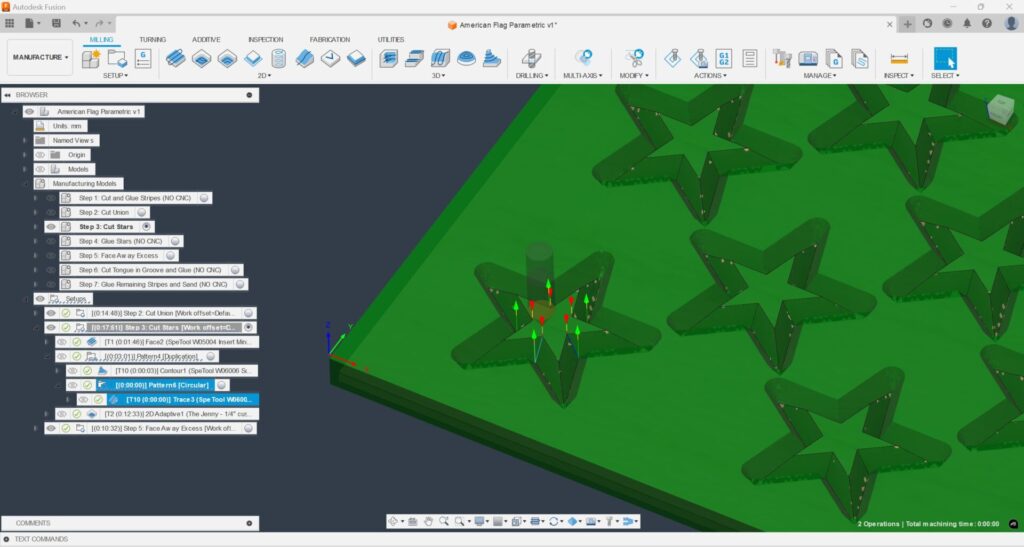
Step 3.3
- Trace
- Clean up the corners of the star using a V-bit in a trace operation.
- This can be done in a circular pattern, going down one corner and up another.
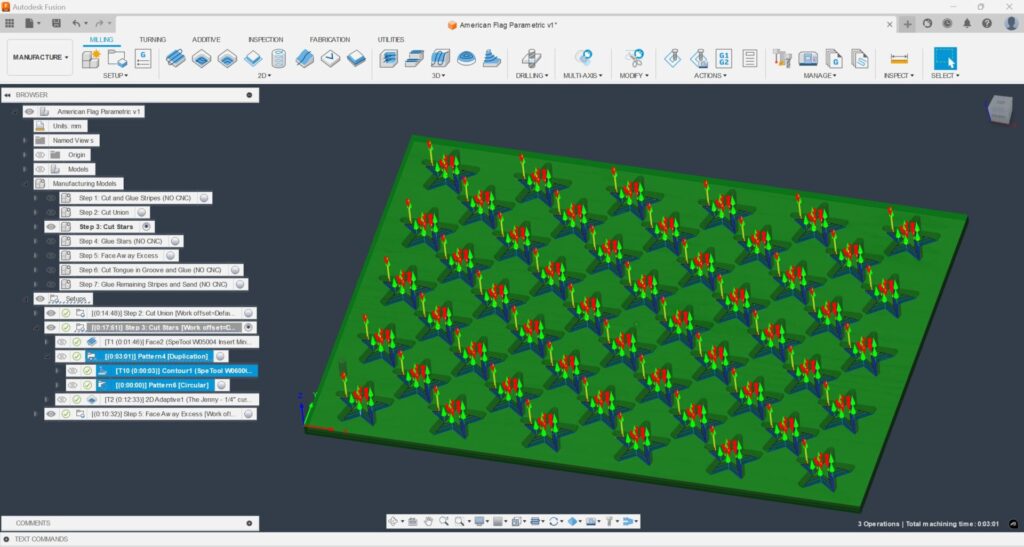
Step 3.4
- Duplication Pattern
- Pattern the toolpaths from Steps 3.2-3.3 (Contour, Trace) using a duplication pattern at the locations of all 50 stars.
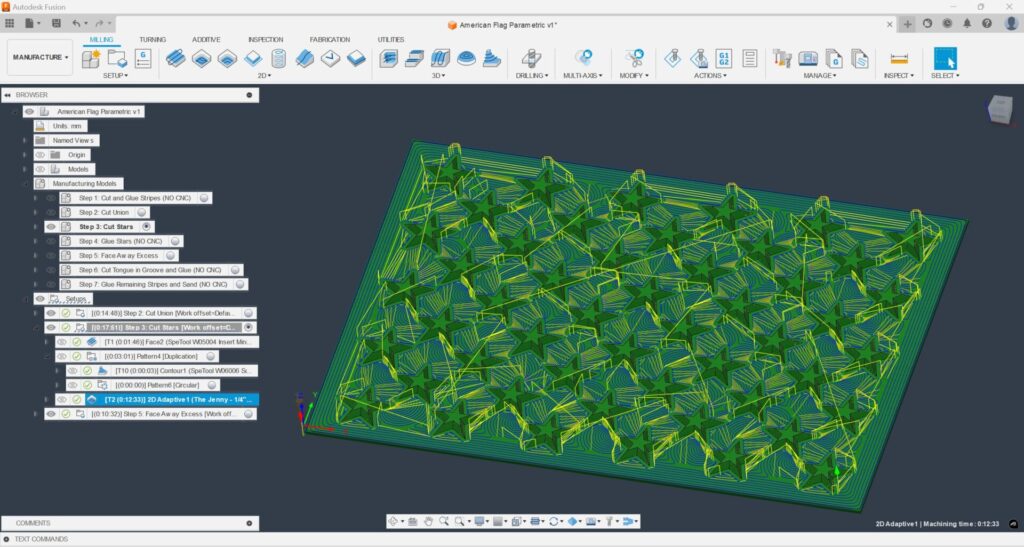
Step 3.5
- Adaptive Clearing
- Clear the excess material from around the stars using a Straight Bit in an Adaptive Clearing toolpath.
Step 4 – Glue the Stars into the Union #
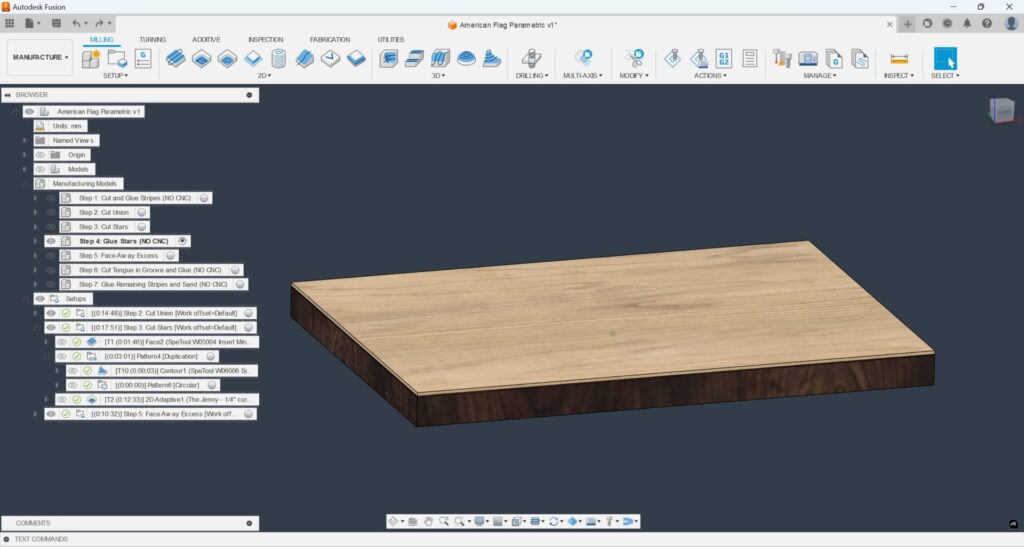
Step 4.1
- Coat the Maple Stars and the Walnut Star Pockets with a layer of glue.
- Sandwich the Walnut and Maple together and clamp firmly.
- Use clamping cauls to apply pressure in the center.
Step 5 – Face away Excess Maple #

Step 5.1
- Face
- Once the glue has set, face away the maple from the Walnut Union.
- You can leave a little extra that can be removed after gluing the union to the stripes, but make sure to account for that when cutting the tongue and groove joint in Step 6.
Step 6 – Cut and Glue Tongue in Groove Joint #
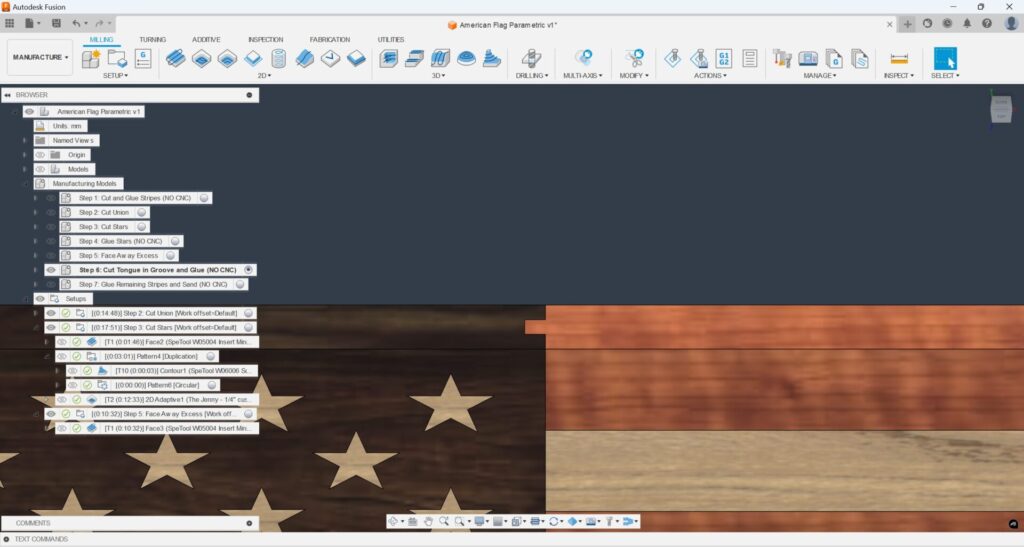
Step 5.1
- Cut a groove into the Walnut that is approximately a third of the total thickness.
- Cut a matching tongue into the shorter section of stripes.
- Glue and clamp the Union to the stripes, ensuring that they remain flat throughout the process.
- After the glue dries, plane away the excess.
Step 7 – Glue the remaining Stripes #
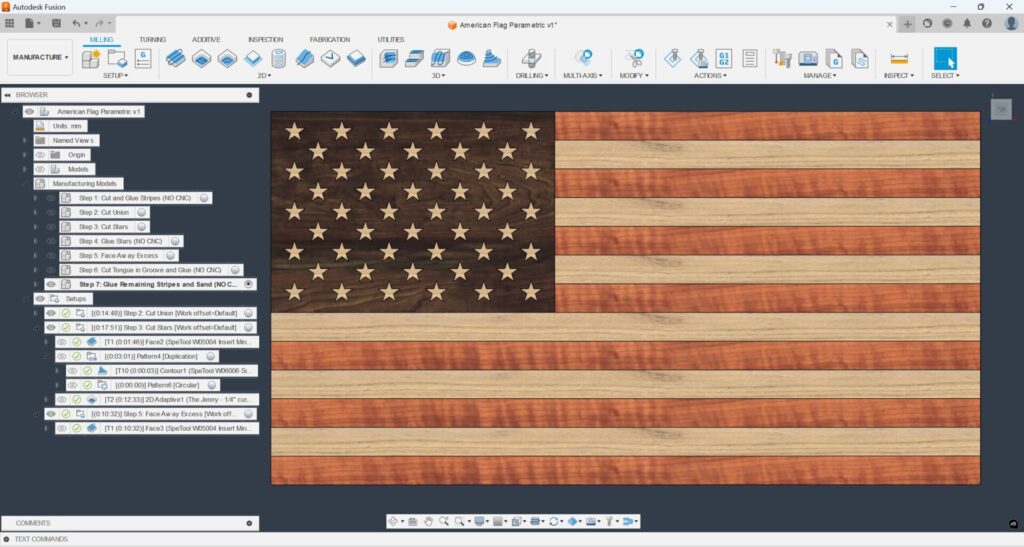
Step 6.1
- Glue the lower 6 stripes to the previously created Union+Upper Stripes assembly.
- Sand the flag with increasing grits.
- Apply an appropriate finish for your use case.
- Make sure to apply a food-safe finish if using the flag as a cutting board.
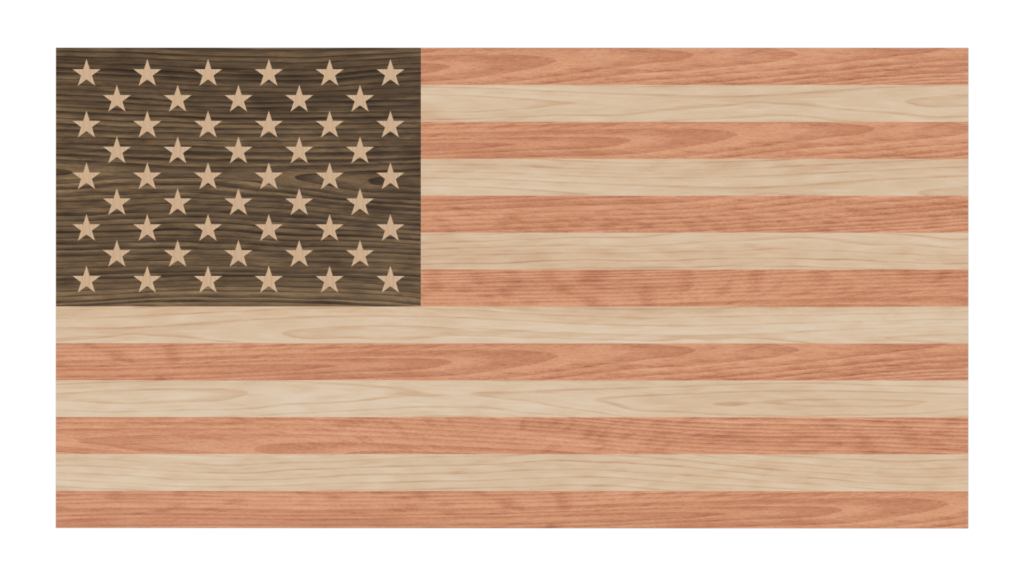
Step 8 – Your Flag is Complete! #
Changelog #
| Date | Description |
|---|---|
| 2024/09/23 | Initial release |